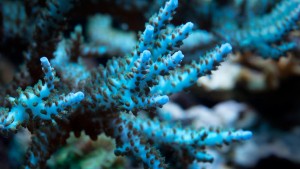
Many of the corals and other sessile invertebrates we keep in reef aquariums are considered “photosynthetic,” meaning much of their nutrition is produced by photosynthetic algae (zooxanthellae) residing in their tissues. Thus, there is a direct link between the type and intensity of a reef aquarium’s lighting and the health—or even survival—of the corals and other invertebrates it contains.
However, it’s very important to understand that corals acclimated to a certain level of lighting can be severely stressed if they’re suddenly exposed to higher-intensity lighting. This commonly happens when:
- A specimen kept under subpar (no pun intended) lighting during shipping or in a dealer’s tank is newly introduced to a brightly lit aquarium.
- The reef system’s lighting has just been upgraded, for example from fluorescents to metal halides or LEDs.
- The hobbyist waits too long to replace aging bulbs or tubes.
- Dissolved organic compounds that cause yellowing of the water are suddenly removed (e.g., via chemical filtration with activated carbon).
So how can you avoid photoshocking your invertebrates? Here are six ways:
1) Research your inverts’ lighting requirements
Photosynthetic invertebrates vary widely with respect to their lighting needs. Some, including many corallimorpharians (so-called mushroom polyps), prefer relatively low lighting levels. Others, such as the various Acropora species, demand fairly intense illumination. Still others fall somewhere in between or can adapt to different lighting intensities if acclimated gradually. The key is to research the care requirements of any species you plan to keep to ensure you can provide the appropriate level of illumination as well as to guide its placement in the tank relative to the lamps.
2) Begin at the bottom
When introducing a newly acquired coral to your system—even if it’s a species that requires intense lighting—it’s generally best to place the specimen on the bottom of the tank initially. Then, very gradually and incrementally move it upward, allowing it to acclimate to the light at each level for about a week, until you reach the desired point on the rockwork (unless, of course, the desired point is the bottom of the tank).
3) Elevate the lights
Alternatively, you can raise the light fixture higher than usual above the tank and incrementally lower it down to the normal level. Obviously, some lighting configurations (e.g. pendant-style fixtures) lend themselves to this approach better than others (e.g. hoods that sit on top of the tank).
4) Layer on the shade
This photo-acclimation method, which I learned from Anthony Calfo’s writings (though I don’t know whether or not he was actually the first to suggest it), involves placing several layers of window screening material between the light source and the top of the tank and then gradually removing one layer at a time. The screening material should be sized and positioned such that it shades only the new specimen—not the entire tank (an important consideration for established systems).
5) Stay on schedule with bulb/tube replacement
Over time, the intensity and spectral characteristics of the bulbs and/or tubes in reef-lighting fixtures drift away from the desired ranges. If you wait too long to replace them, your invertebrates will become acclimated to the lower light level and then experience photoshock when you finally swap the lamps out. For best results, keep a record of when you purchase new lamps and be sure to follow the replacement schedule recommended by the manufacturer.
6) Be careful with carbon
In some instances, photoshock occurs in corals not because the intensity of the lamps has changed, but because the penetration of light through the water column has suddenly improved. This can happen, for example, when activated carbon is used in an established system to remove yellowing compounds from the water. To prevent this, it can be helpful to use either the light-elevating or shading technique described above after using activated carbon to polish your water. However, if you’re performing water changes with adequate frequency and utilizing a properly sized protein skimmer, etc., the significant buildup of yellowing compounds in your water shouldn’t really be an issue.
Note that light penetration can also improve suddenly after a long-overdue cleaning of aquarium cover glasses and/or light fixture lenses. But again, this can be avoided easily enough with the regular application of “elbow grease” to prevent salt and/or calcium deposits from building up on these surfaces.


