The last article discussed some of the quick and simple ways to take care of your reef while being away for just a short period of time. Due to my work responsibilities, which require travel around the world for two- to three-week periods at a time, I need as much automation as possible and confidence in the solutions I choose.
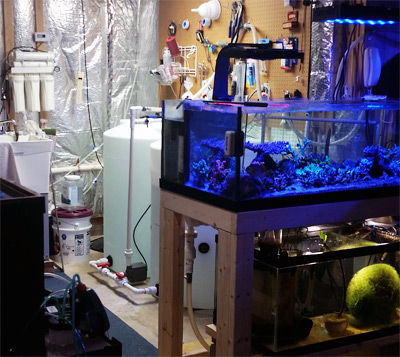
Here’s a high level overview of my system. I currently have a 365-gallon system made up of three display tanks (125 reef ready, 90 reef ready, 80 reef ready rimless), a 40 breeder refugium, and an All-Glass Megaflow 4 sump.
Goals
I have been in the hobby for over 25 years, and starting in 2006, I decided I wanted to tackle hard corals more. I worked in an LFS growing up and read every book that existed at the time. Before long, I realized it is very difficult to have a truly successful “mixed” reef and to satisfy every requirement for softies, LPS, SPS, and fish all in a single tank. With chemical allelopathy from certain soft corals, the stinging sweepers of some LPS, and the higher water flow and water chemistry requirements of SPS, it was clear it would be easier to satisfy some of the controllable needs—like flow, lighting, and nutrient levels—in separate tanks. Yet having separate tanks typically acts as a chore multiplier, which is not a good thing when time is already at a premium. This led me to my next concern.
My second requirement was to ensure ease of maintenance in all the tanks, so I plumbed them all together to a single sump. With this configuration, I am able to clean one set of filtration equipment, perform a single water change, and feed all three tanks at the same time. The positive side is that you have one set of equipment for everything and there is no longer a multiplier effect. An additional advantage is that even with a larger volume, you can use multiple smaller pieces of equipment to practice “redundancy.”
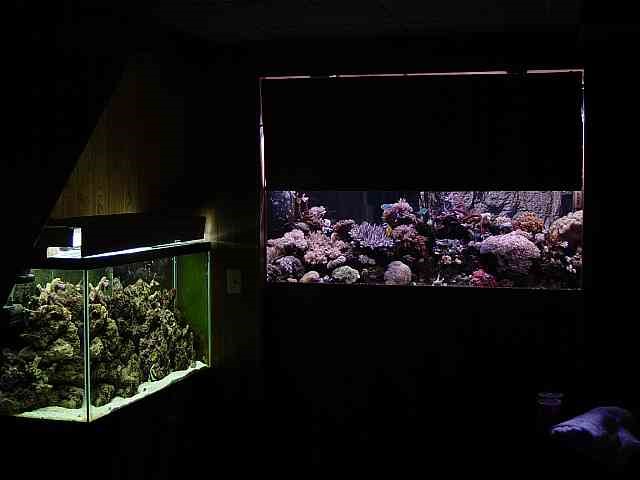
My third goal was stability. With higher water volume, small mistakes usually don’t turn out too deadly. The water chemistry, salinity, and temperature will undergo fewer drastic swings throughout the year. You can keep livestock in many different water parameter settings, but stability, once you have it dialed in, is the most important.
Since I achieved all the reefkeeping basics, full control of my system while I am away has been my focus. With the concept of “The Internet of Things,” I want a truly controllable and manageable system no matter where I am in the world (as long as I have Internet access at least!).
Finally there’s my emphasis on “presence.” I must have a way to see what I am doing and how the organisms are faring while I am away. There’s no better sensor than your own eyes for determining how good your corals look and what you are doing when you activate certain controls remotely. It’s nice to have control, but a way to validate that your controls are truly doing what you expect is also a logical feature.
Planning
As stated in Part 1 of this series, it’s important to start out by listing all the major components and resources you need/have and then sketching it out to get a better visual of how it looks for placement and functionality.
Components
- Tanks: 125RR, 90RR, 80RR rimless, 40breeder, 20L
- Sump: All-Glass MegaFlow 4
- Refugium: Red mangrove, Chaetomorpha, Caulerpa racemosa
- Storage: 34g Brute, 110g Rubbermaid trough, 2x Norwesco 100g vertical tanks
- Pumps: Reeflo Dart, 2x Quiet One 9000 (backup), Quiet One 3000, RIO Plus 3100,
Maxijet 1200 - Circulation: 2x Jebao WP25, Jebao RW15, Ecotech Vortech MP40, 4x Hydor Koralia 4 on
wavemaker, SEIO Super Flow 1500, Maxspect Gyre XF150 - Mechanical filtration: 200 micron mesh socks, 150 gpd RO system w/ TDS meter
- Skimmer: Skimz SK201 w/ Ozotech Poseidon Ozone Generator, TurboFlotor Multi 1000, AquaC EV180
- Filtration: All-in-One BioPellets in JNS2 Reactor, BRS Dual Reactors GFO/GAC
- Heating/cooling: 3x 300W Finnex Titanium w/ remote controllers, JBJ 1/6-hp chiller
- Lighting: 2x Maxspect Razor 420 16000K, 3x Evergrow D120, Ecotech Radion G3,
2x Phillips Par38 6500K floods - Controller: Neptune Apex w/ 4x Energy Bar 8, PM1, PM2, WXM, 2x Automatic Feeding
Systems, Advanced Leak Detection, Milwaukee pH Controller, Milwaukee ORP
controller - Probes: 2x pH, conductivity (salinity), temperature, oxygen redox potential (ORP),
floor leak detectors, various float switches - Dosers: Refrigerated Jebao Quad doser, 3x BRS dosers
- Auto top-off: JBJ ATO, Blueline Pressure ATO
- Testing: Red Sea Marine Test Kit, Red Sea Pro Mg, Hanna (Alk, Ca, PO4), Red SeaCoral Colors Kit
- Salt: 6x Instant Ocean Reef Crystals 200 gallon boxes/year
- Consumables: BRS Kalkwasser, GFO, GAC, calcium, alkalinity and magnesium, Pre-Reformulation of Prestone Driveway Heat (CaCl), Epsom salts (Mg), Arm & Hammer Baking Soda (Alk), Sea Klear Commercial Grade Lanthanum Chloride
Sketch
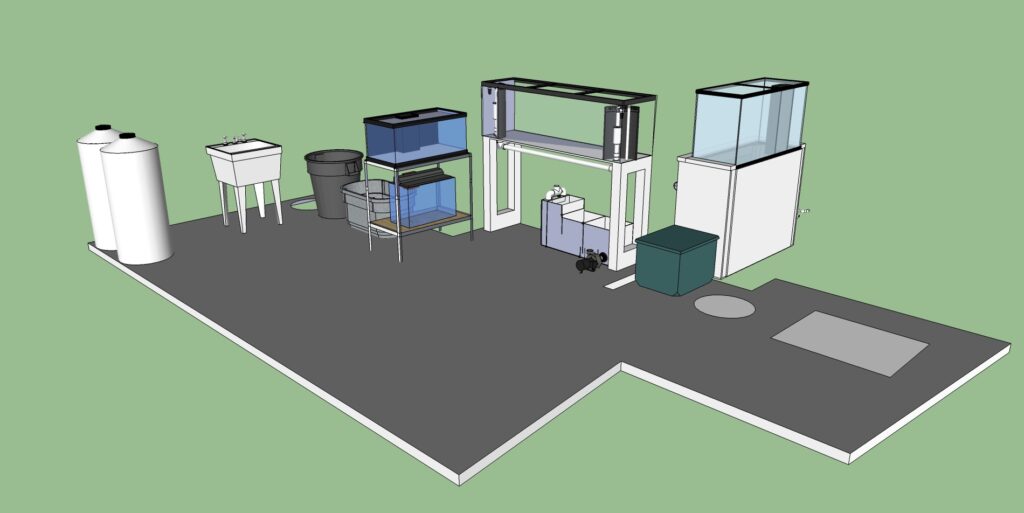
As an engineer, I like to draw everything out using some type of computer-aided-design software so I can simulate everything to scale. The sketch helps me show my ideas and plans to my family and gives me a sense of the space it entails. It’s easier to size things up and make changes for looks and workflow around the area for best functionality.
Reality
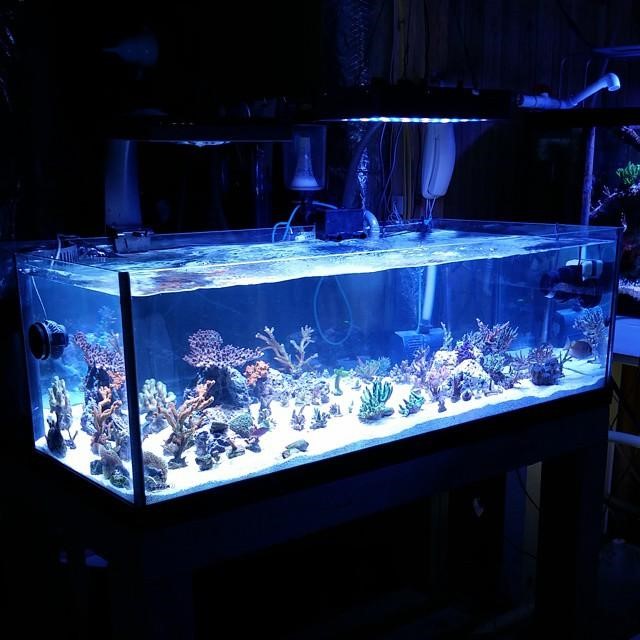
Live rock and sand
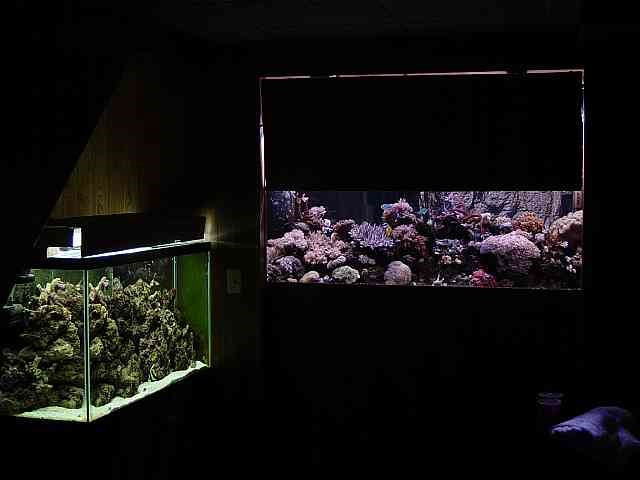
I originally started the system as a bare-bottom tank with starboard underneath the rocks, but after running it like this for six years, I noticed I didn’t have enough pH-buffering capacity, so I added a sugar-fine, 5-inch DSB in the 90-gallon and only a decorative 1-inch layer in the 125. The 80-gallon frag tank used the larger CaribSea Seaflor Special Grade, since sugar-fine sand would choke out and kill SPS if they fell into it.
But just recently, after my last two-week trip in May, I noticed that even the slightly coarser substrate had issues with building up detritus and algae started growing on the surface of the larger grains. I completely stripped it back to bare glass bottom, since my cleanup crew was not able to keep up with cleaning the substrate of algae and I was tired of vacuuming the sand every few weeks. So, in effect, the maintenance trumped the buffering capability of this substrate.
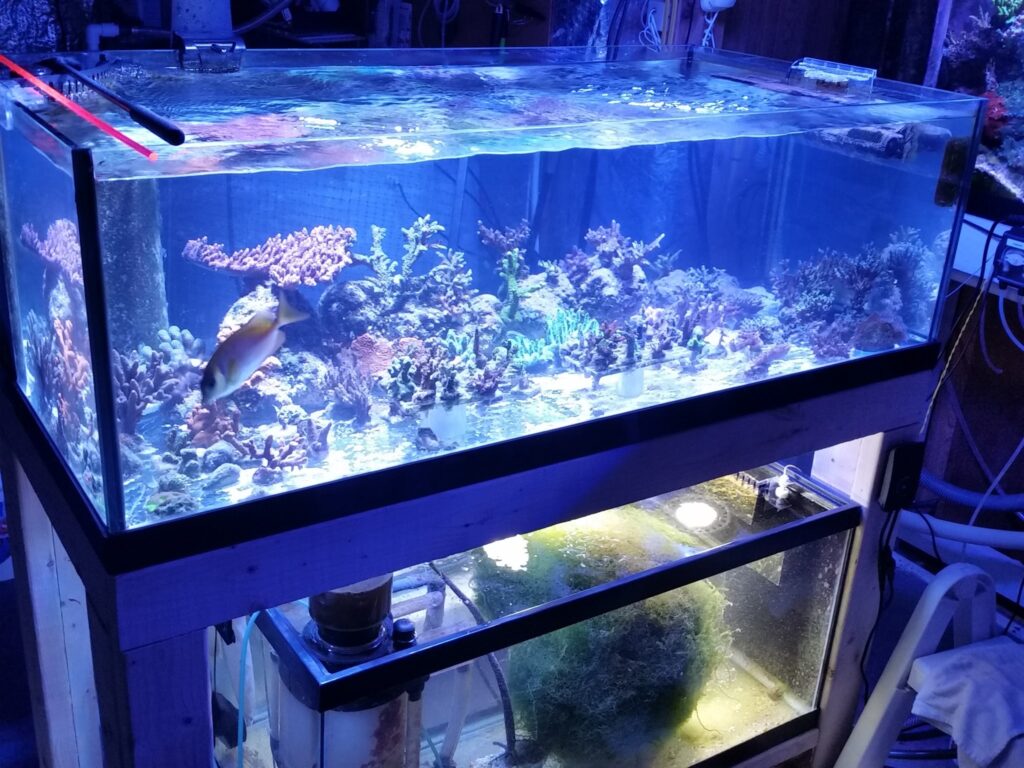
As far as live rock goes, I was originally following the old adage of 1.5 pounds per gallon, but through the years, the massive rock wall was just overkill and took up needed swimming space and openness. The simplicity of some of the current tanks is more appealing to me nowadays. With the addition of newer forms of biological filtration methods, less surface area from live rock is needed. I have greatly reduced the amount of live rock in my tanks to gain back some needed living space for more corals and proper water circulation. Drilling holes in some of the live rock also helped with mounting frag plugs without epoxying them.
Filtration
I am currently running a sump utilizing two 200-micron mesh socks, since they don’t clog up as fast as felt socks do. Each time the felt socks fill up, the auto top-off system overcompensates and the salinity tends to drop, causing unnecessary salinity fluctuations. The water then runs into a JNS2 Biopellet reactor filled with 1 liter of All-In-One BioPellets, since I have been trying to avoid using GFO and GAC. So far, I can only reduce the BRS Dual Reactor for ½ cup of GFO/GAC to 6 hours/day. This water is then skimmed out by a Skimz SK201 Cone skimmer before returning to the tanks via a Reeflo Dart and the Rio 3700.
In addition to the sump, I have converted a 40-gallon-breeder tank to a basic refugium that contains nothing but a Turboflotor 1000 Multi skimmer (2nd skimmer acts as a redundant system), a red mangrove, and a large ball of Chaetomorpha that is kept spinning by a Hydor Koralia 4. It is lit with 2 Phillips 6500K Daylight LED floodlights equivalent to 120 watts each. The refugium acts as a natural nitrate and phosphate reducer if the GFO/GAC get exhausted, and there’s no easy way to tell when either of these is fully saturated.
I have chosen to use biopellets for organic carbon dosing to actively reduce the nitrates and phosphates, since my bioload varies a lot as my inhabitants grow. I have dosed vinegar and vodka in the past, but to me, biopellets are a sure winner in terms of simplicity and having one less doser to manage.
When running a carbon-dosing method, the side effects that go along with it, such as cyanobacteria outbreaks, need to be managed. The only way I have found to eliminate this is by using an ozone generator and ORP controller to maintain the ORP in the desired range of 375 and 425 mV. I have noticed that the ozone generator also acts as a redundant feature to granular activated carbon by polishing the water crystal clear when applied. It also oxidizes the detritus sludge that builds up in the sand over time and fuels the cyanobacteria blooms in the first place.
Circulation and lighting
In my 125 display of SPS and mushroom corals, the circulation is driven by an Ecotech MP40 and a Jebao RW15 with wave motions set to random. This system is lit by two 27-inch Maxspect Razors 16,000K set on a gradual ramp up to ramp down. I removed the original 90-degree lens to distribute the lighting more.
The 90-gallon LPS system has four Hydor Koralia pumps hooked up to an old-style wavemaker set to crisscross from the corners. This is lit by two Evergrow D120 full-spectrum LED systems with 120-degree optics with the White Channel set to only 30% and the Blues at 100%.
Finally, the newest Deep Blue Professional Rimless 80 received its newest Maxspect Gyre XF150. This replaced 2 Jebao WP25 and a Hydor Koralia 4. The lighting is a combination of an Ecotech Radion Gen 3 and a full-spectrum Evergrow D120 with 120-degree optics installed.
With this setup, I can test various light cycles and settings and also fine-tune flow specific to each organism’s needs.
Control center
Now that all the basics are set up to run the system, I need a central brain for all the body parts. I must say the aquarium controller was the best investment I ever made. Getting the right one with expansion capabilities allows you to grow as the need arises. Sure, these are not cheap relatively speaking, but I’d rather make the investment that will keep my livestock alive and thriving. Technology these days helped incorporate so much, from basic functional management to a remote-controlled monitoring system. For me, it is all about control, since I am my most demanding customer.
I chose the Neptune Apex system due to the expandability and the amount of features it has and could have. I added more energy bars as I expanded my systems, but I also kept in mind that more isn’t always better. You should always look to reduce energy consumption and complexity wherever possible.
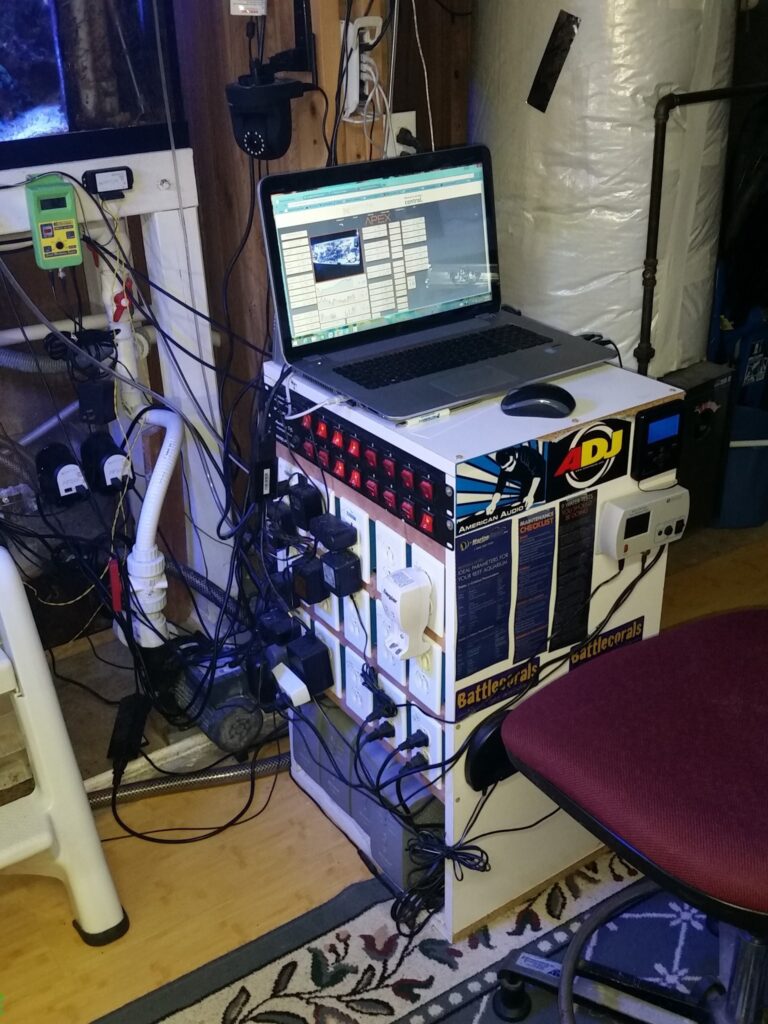
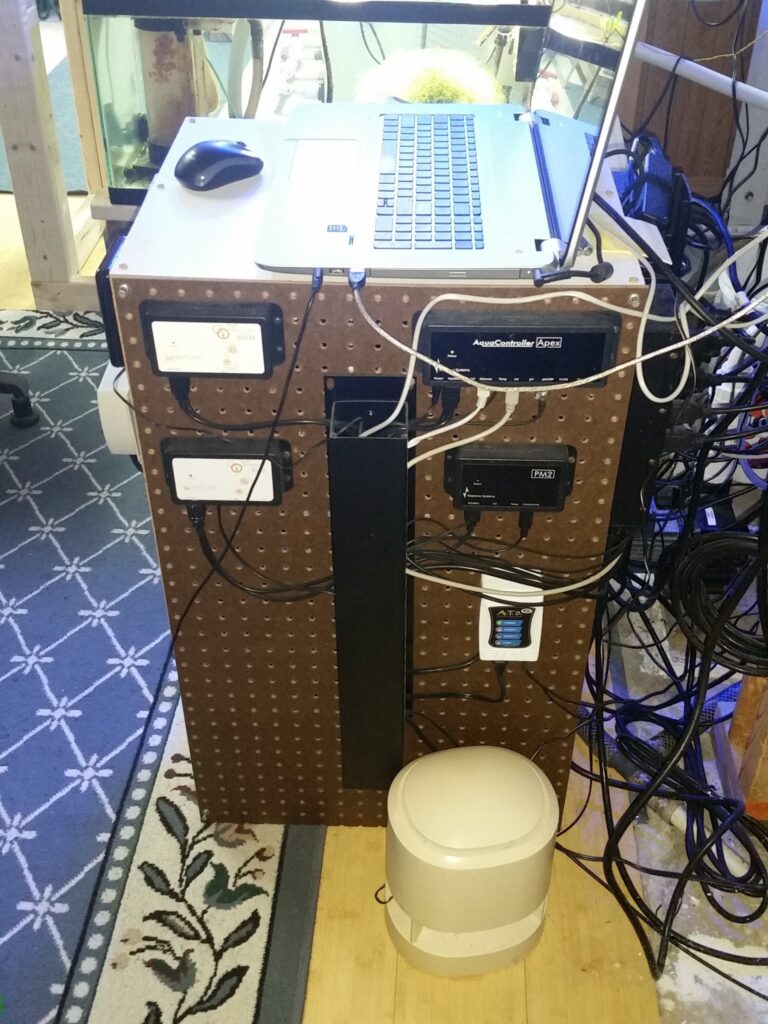
I have built an electrical power station control box from some ideas I got from Marc Levenson’s webpage. It houses the main input power and some backup power supplies I made for my MP40 and other DC-driven pumps. This housing helped consolidate many of the wires and components, but I’m still in the works of trying to get a cleaner professional look in terms of cable management.
The base probes I have cover salinity, temperature, CO2, ORP1 and ORP2, pH1 and pH2, and one advance leak detector. In conjunction, I have various float valves that act as inputs for the: auto top-off system, sump max water level, skimmate max waste level, refugium max water level, and saltwater containment max water level.
All this is integrated so that I can perform the following while I am away:
- Water changes
- Control of all devices
- Automation of required dosing
- Automation of required feeding
- Removal of skimmate waste
- Monitoring of some key parameters
Presence
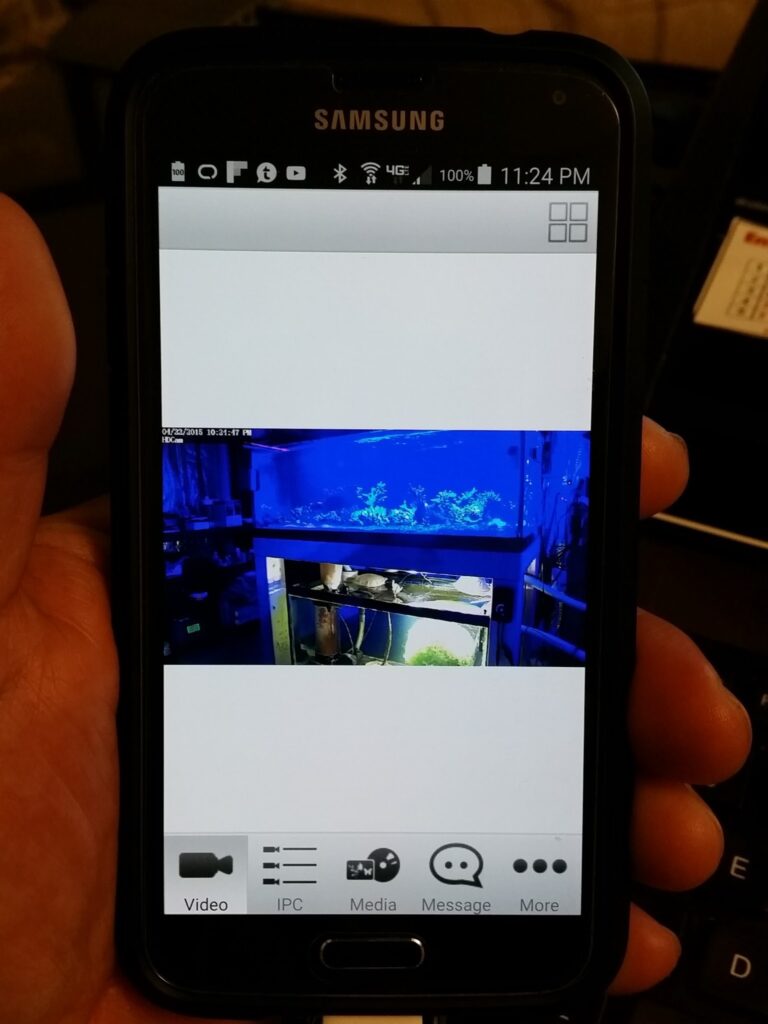
With the controls in place, the final thing I need is to feel secure about this. I need the ability to validate that the controls I implemented are truly doing what I have programmed them to do. This involves what I call “presence.” When I turn something on or off, I want to be able to witness that it is truly responding. Unfortunately even the internet has its downsides and one of them is lag or response time. You need to understand that there is a delay for data transmission, and you must plan on these substandard failures. Having IP webcams available to monitor each tank and sump allows me to debug and improve my system since every trip becomes a system failure test.
For example, the HD Pan/Tilt/Zoom camera I have next to my control station can provide the following preset views:
- Frag Tank Front
- Refugium Front
- Sump Top
- CO2 Monitor
- Secondary pH Monitor
Other cameras are set to monitor each tank from the front and possibly from the top, the fish room, and the command center just in case I need to personally walk someone through a task.
Performance of such a system is highly based on your internet bandwidth and the network structure you defined in your house. I am running a 1GB network internally, and I try to keep things wired, since even an 802.11n wireless system in a small home has interference issues and I have at least 10 IP webcams running on top of the various PCs in my house.
Presence can also indicate direct communication. Along with my video reception, each camera provides a mic and speaker so I can actually communicate directly to the camera location. Always provide a communication path to assistants just in case they need help or see something that is concerning. In my fish room, I also provide a laptop that has a guest login and a direct link to my Google Hangouts account on the desktop, since I can accept these calls and perform a video conference immediately either from a PC or my smartphone.
Summary of Part 4
Not surprisingly, the key to an automated system is the controller, but without the proper input/output devices and the logic to bind them together, the system will not meet the goals defined. Also, the importance of “presence” can’t be overestimated in complex systems such as reef tanks. The combination of these two factors provides a solution for my needs.
Yes, these are not cheap, but keep in mind that it is an investment in the sea creatures you love and strive to maintain. This is purely a simple overview of my system, which has been constantly evolving since we moved into this house about a decade ago. As a fellow hobbyist, I hope some of this information has been helpful to you so that you can avoid some of the pitfalls many of us have been through and prevent unnecessary losses of specimens.
On my next article of this series, I will discuss some of the things I have on my list of improvements and my wish list of future products I would love to have. There are some neat products on the horizon that have piqued my interest, and if you are in the same situation as I am—having to travel constantly—I think you’ll be interested, too.
Read the other installments in this series:


