The Vertex Illumina (not to be confused with the Vertex Illluminata) is currently one of the higher end LED fixtures on the market. As a result the Illumina LED comes with all the bells and whistles we have now come to expect from our advanced aquarium LEDs, including wirless computer integration. Since we are now at a point where software and smartphone apps play a significant role in distinguising and evaluating LED fixtures, we thought we’d give the Vertex Illumina software a run down in a dedicated post. Considering the software is packed with features, advanced options, and since it is relatively easy to setup (no cables needed) it is definitely killer software we have a lot to say about.

After downloading and installing your Vertex Dashboard (instructions can be found on the vertex website) you will be greeted with a blank screen and an option to connect your fixture. Connecting to your fixture is done through a wireless USB dongle (or v-link as vertex likes to call it) that plugs into the USB port of your computer. The V-link connects via wireless, but is unfortunately quite sensitive to “noise” in the signal (lots of other wireless signals here at RB HQ). Long story short, we had to be close to our Illumina fixture when setting up the software (a couple feet actually). So unless your desktop is right next to your aquarium you might have to pull out a laptop. After confirming the connection to your computer on the fixture by simply pressing a bottom, the software is all setup, and the fun is about to start.
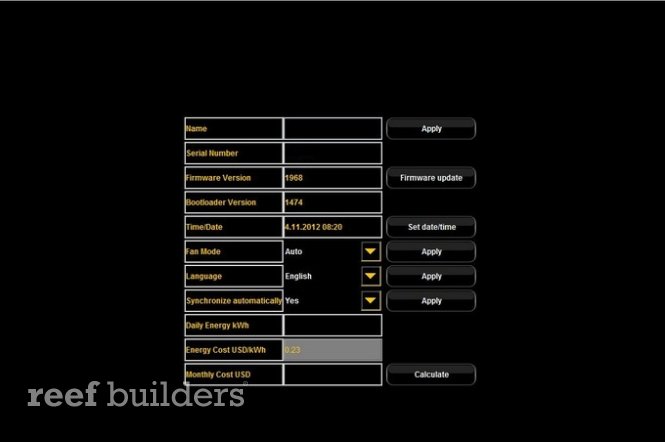
The vertex Dashboard software has five main tabs, a summary, day programming, moonlight programming, special settings and temperature control. The summary, which can be seen above just shows some basic information on the fixture like the serial number, date and time, software versions, language, and fan control.
The summary also contains a build in calculator that allows you to calculate the electricity cost of running the fixture. Simply enter the price of electricty per kWh, select your light program and the calculator will show what your monthly bill for just the fixture will be like – definitely a neat feature to find within the software.
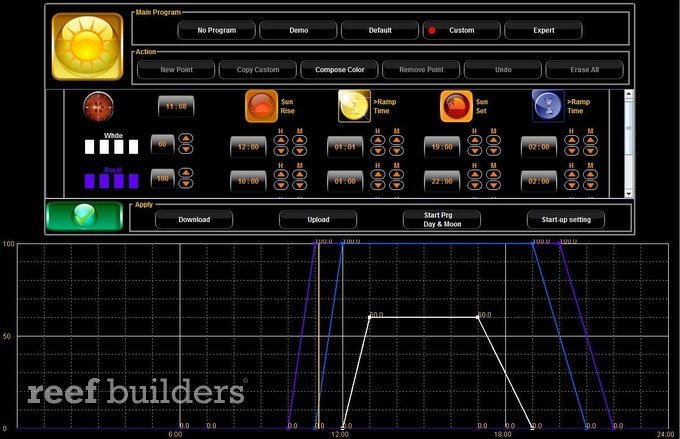
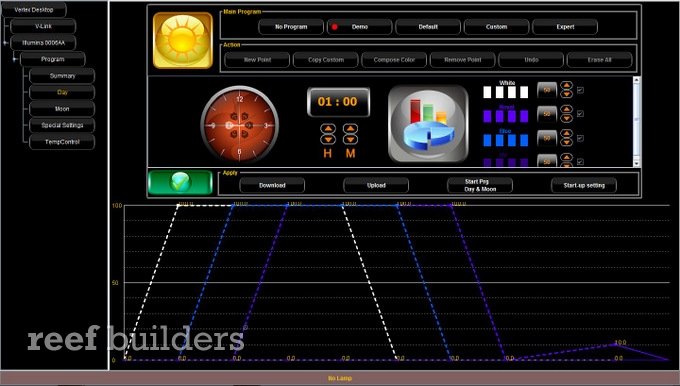
The Day Programming tab is where alll the action happens, and it is here you will configure your light schedule. Several different option can be selected, depending how costumized you want your schedule to be. A Demo (seen in header image), and Default tab are included in the case you would prefer not to mess with any graphs or light intensities. If you do like to be involved and would like to create your own configuration you’ll be able to pick between custom and expert.
Custom mode is recomended for beginning users, and Expert is recommended for those that really desperately want to control every single aspect of the light cycle. The Custom mode will ask you to set the maximum intensity of each color, the time when the fixture will turn on and off, and ramp time for sunrise and sunset. Depending on your settings the light will as a result will turn on, slowly increase intensity, stay at the maximum set values throughout the day and will ramp back down again, after which it will turn off. Simple enough, and likely fine for the majority of users.
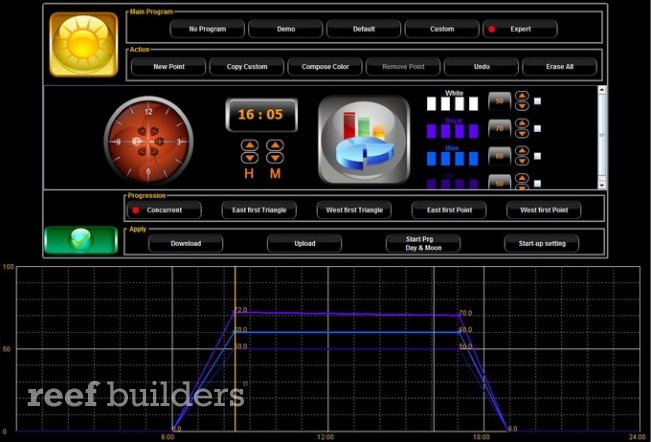
The Expert mode on the other hand will provide no such guidance, and instead you’ll have to pick time points, and set intensities. The expert mode is definitely much more hands on, but it does allow for more features. If you would for example like your blues to dim down, and your whites to peak for a couple hours at noon, you will be able to do so. If for whatever reason you’d want two or three peaks, you could also do so. Basically you’ll be able to create a light configuration as crazy as you’d like.
Working with too many points can be a bit painful since you are unable to type in the percentage values, and are instead left clicking until you reach the desired levels (which gets really old really soon). Fortunately however, the ability to simply grab points and drag them to up to desired locations and time points makes completely up for it.
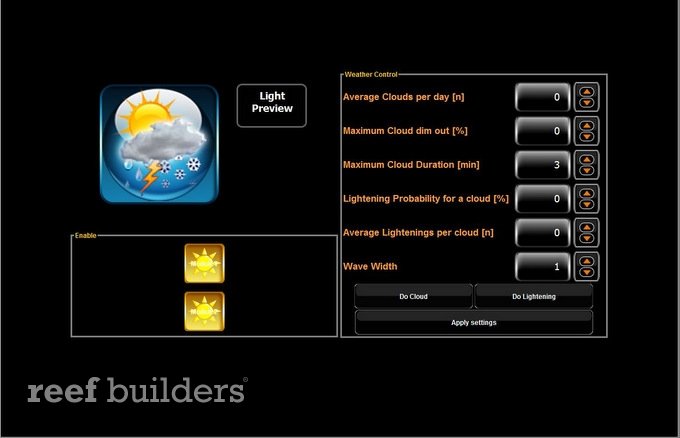
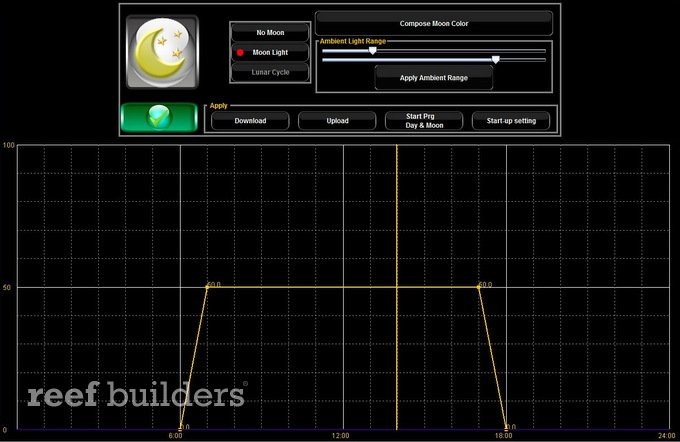
The other three tabs contain the more “cool factor” related features such as moon cycles, lightning and cloud simulations. Moonlight configuration is extremely simple, and will just ask you to set maximum and minimum values. Built-in lunar simulation software will do the rest. In the case you like your lights completely off at night, a no moonlight option is also availible.
The special feautres tab contains the rest of the above mentioned features, and will allow you to costumize you’re cloud simulation. Things such maximum clouds per day, intensity, duration, probability of lightening, the amount lightening strikes at a time, and wave size can all be edited here. All very detailed, and really nice touches if you are interested in cloud and lightening simulations. The last tab is the temp control which will allow you to monitor temperatures within the fixture.
The Vertex Dashboard for the Illumina is a very solid piece of software. Although we can imagine the limited range of the V-link might be a bummer if you are operating in a noisy environment, it really doesn’t affect the software itself. It should be noted that there are some minor glitches within the software, but you’ll have to work hard to find them and none of them should effect your ability to configure the light. Any feature that we could have thought of and more can be found in the Vertex Dashboard software, and it was more than able to meet our needs.


